Showing posts with label Week 06. Show all posts

Friday, September 7, 2012

Toddler Photo Shoot

This week's theme has been based around my soon-to-be two years old, birthday boy, Xander. Last year when he turned one, we took him to get professional photo's done. This year I tried my luck with some Pinterest inspiration to save us money and have are own little photo shoot.

I did recently get the Canon 50mm f/1.8 lens for our DSLR Canon 60D. So whatever money was going to pay for a professional photo shoot this year went to my new lens. Bad Mommy. But I was pleasantly surprised by it's performance and picture quality.


I found a Pin that led to a blog that had 100 toddler photo shots. See here. This Pin helped me get a little creative with my photo shoot. The best pictures had great locations, so I knew just the place. We have a little lake by the house, so we set off to take some pictures.

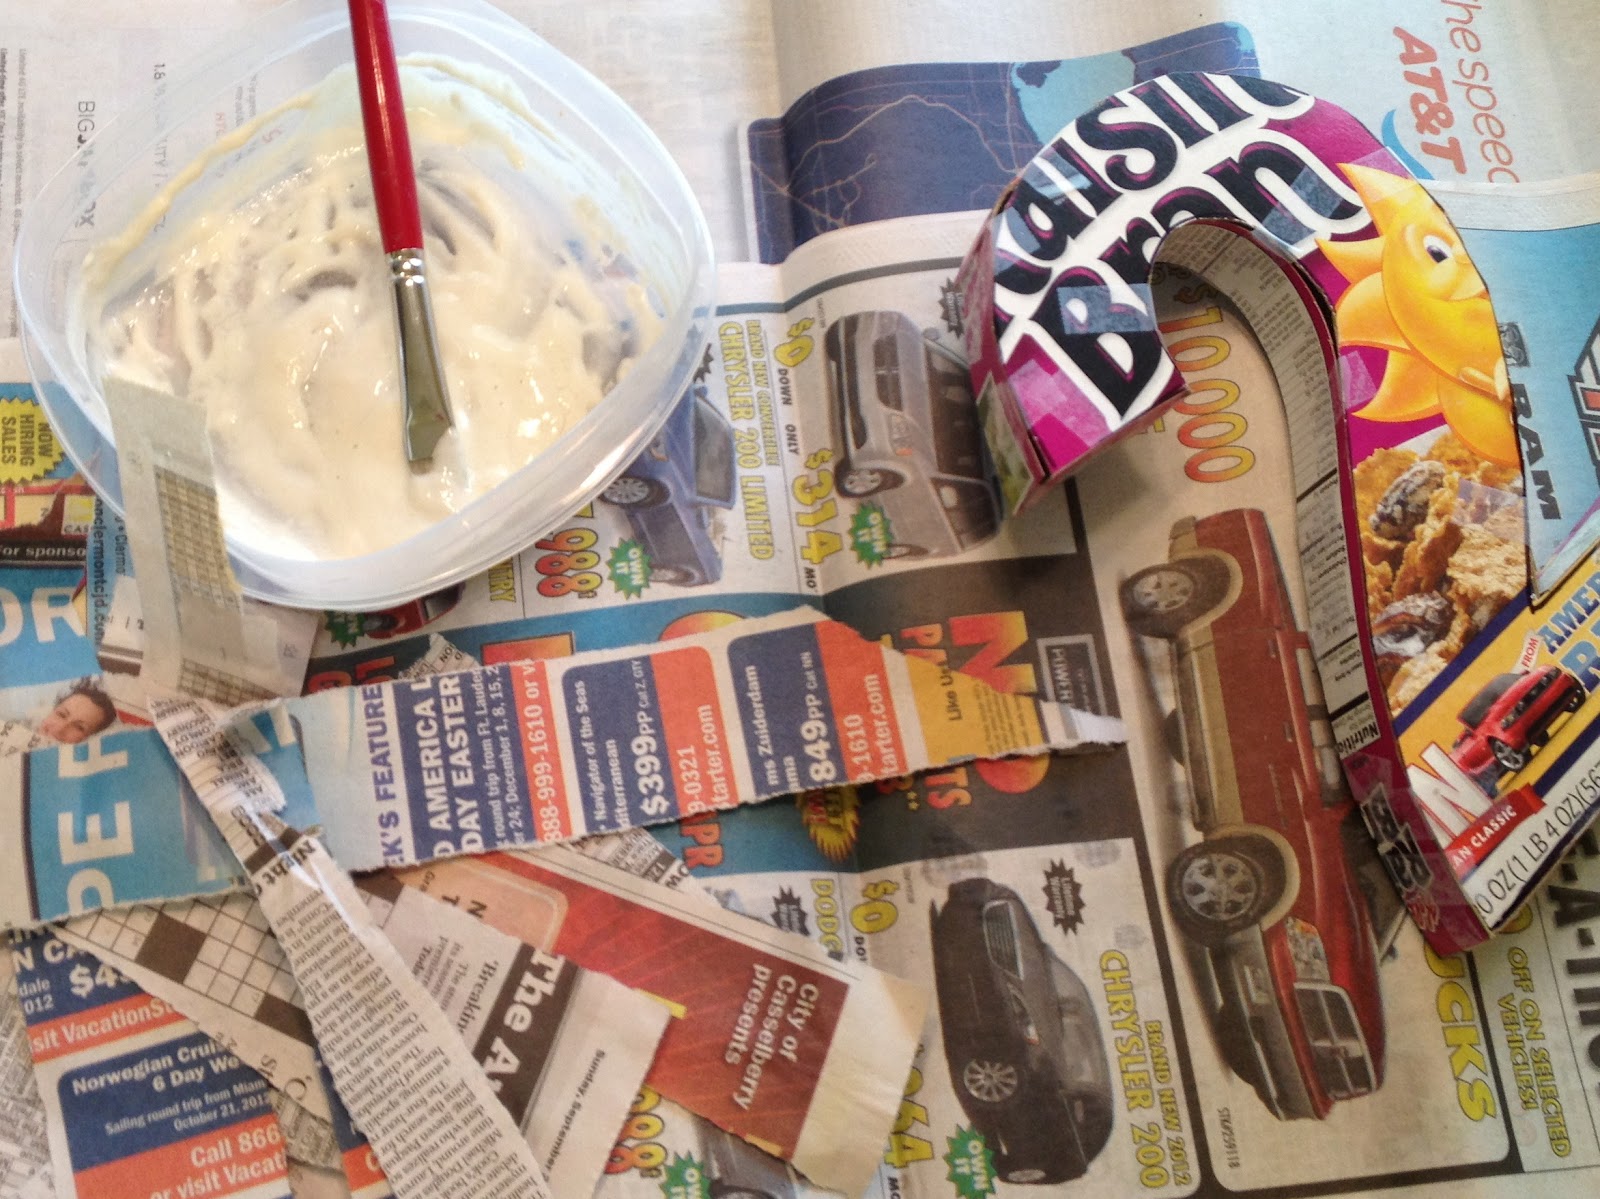
I also love props in photos so I made a 3-D letter block of the number 2. Check it out here. And I purchased an empty picture frame from Walmart, for $3.87.

Out of 300+ pictures, here are a few of the gems I captured:
(All photo editing was done with a simple editor, free from Google called Piscasa)


This was the very first picture I took, and absolutely loved it. It reminded me of pictures from my grandfather. I added the sepia filter to really give it that 1940's feel.


He did pretty good with the props, too bad we couldn't get a smile.


Sometimes the best pictures are on accident. We were walking towards are next location, when I snapped this gem.


Frame on some twine with my photo assistant holding it up for me. Thanks Honey!


We had to break out the big guns and bribe him with Reese's Pieces. It did keep him participating longer.


The Pinspiration Pin had lots of kids feet and I thought it was super cute. So this is my artsy attempt at cute feet.


Poor guy just fell off the swing, but wanted to swing more. I love the emotion on his face.


These next few pictures I think are picture perfect. The lighting was amazing, the subject was corporative. Can't get much better than that.


This is hands down my favorite picture.


This week has been so much fun ramping up to celebrate the big 2. I may not be a professional, but I don't think I did too bad for an amateur. This Pinterest week was a success. 

Wednesday, September 5, 2012

3-D Block Letters

This week I am going all out, photography style. I am pretending to be a professional for the week. I have a new lens and some filters for my DSLR, so I'm pretty sure that makes me a pro.

Every professional has photo props for their subject to sit in, stand on, hold, or just to be in the picture. I thought since I was doing a photo shoot for my soon-to-be-two toddler, I would make a block letter with the number 2 on it.

I found a Pinterest Pin on using cereal boxes to make 3-D block letters. The pin leads you to an easy tutorial. Click me.
The supplies are cheap, in my case I had everything laying around the house. Free is for me!

Supplies:
-Empty Cereal Box
-Tape
-Scissors
-Pen\Sharpie
-Newspaper
-Elmer's Glue
-Water
-Flour
-Paint

1. The first step is to trace the letter\number on the cereal box. I used a piece of computer paper and printed out the number 2 in the font Arial. Then I cut out the number to trace. I am a much better tracer than free hander, but I usually suck at tracing too. 

2. Next cut out the letter\number from the box (You will need to make two letters\numbers). Also cut out the sides of the cereal box to make the 3-D part of the block. I cut my sides in half vertically so that the blocks weren't too thick. Now tape the sides to the letter\number. Use long pieces of the cereal box to do the curves. Then tape, tape, tape.
 

3. Once all the sides are on, tape the second letter\number to the back side.  You may need to trim the second letter\number so that they match up better. (Or I might have had to do that because of my mad tracing skillz)

4. Now it's time to paper mache this bad boy. To make the "goop" mix, you combine equal parts water, flour, and glue. This mixture will make the letter\number super sturdy and hard. I used about 4 teaspoons of each for my number, and I really caked it on there.

 5. Paint the "goop" on a newspaper strip, put the strip on the letter\number, then paint on top of the strip to make sure you got it all. Once you have a layer or two covering the letter\number, it should look something like this. Beautiful!

6. Now comes the fun part. Wait for it to dry... This took a few hours, because I really loaded it with the "goop". Once it is dry, paint it anyway and any color you want. Actually you can only paint it blue. 

7. Lastly, take amazing pictures of your creation and post it on your blog. 

This pin was a Pinterest Success, now if only I can get my toddler to hold this while I snap a few photos of him, that should be fun. 

Sunday, September 2, 2012

Week 6 Theme...

Week 6 happens to fall in the month of September, which is my son Xander's birth month. So for the next four week my weekly themes will be based around that guy.

Last week my wonderful husband, Paul, bought me the Canon 50mm f/1.8 lens for our DSLR Canon 60D. This lens is the cheapest of the 50mm lens'. But still cost just over a hundred dollars, which is super expensive in my book. Let's just say Christmas came early for me this year. 
The 50mm is suppose to be a great lens for photo shoots. So this week I plan to have a mini photo shoot with my almost two year old. I am going to make a couple of photo props from Pinterest Pins and use a few Pinspiration photography techniques that I have also found. 

Happy Birthmonth Xander! I look forward to this fun and creative month!